Ok ...Let's get started...
1. Open a transparent image - 500 x 700px.
We will resize it later.
2. Floodfill with your favorite gradient.
Linear Style - Angle 0 - Repeats 0 - Invert-Unchecked.
3. New Raster Layer.
Be sure your gradient is in the Lower box (background) in the Materials Palette.
Invert Gradient.
Tools - Paint Brush - Choose the Christmas Stocking,
or your favorite Xmas Brush.
See settings below...

*NOTE* You may have to click the brush
a couple of times to make it show up clearly.
It will depend upon how strong your gradient is.
4. Click on the Text Tool.
Find the A&S Christmas Script font.
OR
you may use a font of your choice.
Using the same gradient,
I chose to write 'Season's Greetings'.
but you may use whatever you prefer.
See Settings below...

Once satisfied - Convert to Raster Layer.
Using the 'Mover Tool', position to your liking .
5. Still on the Text Layer, Resize 85% (resize all layers UNTICKED).
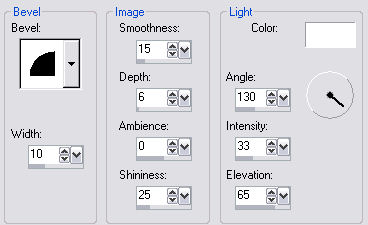
Effects - 3D effects - Inner bevel.
See settings below...
6. Layers - Merge All Flattened.
7. Image - Resize - 85%. (resize all layers TICKED)
Adjust - Sharpness - Sharpen.
Crop your image, if necessary.
Make note of your graphic size.
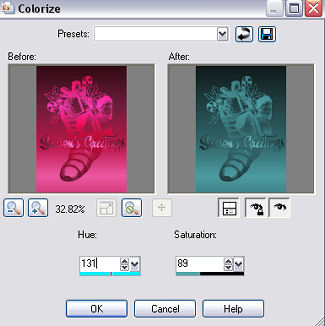
*OPTIONAL*...At this point, I decided that my Graphic
was too bright , so I Colorized it.
Adjust - Hue and Saturation - Colorize.
See settings below...
Set aside for the moment.
8. Open a new Transparent Image, approximately
100px larger, both length and width, than your graphic.
Floodfill with a pale complimentary color from your graphic.
9. Effects - Texture Effects - Texture.
See settings below...
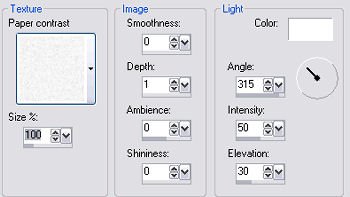
Apply this effect once more.
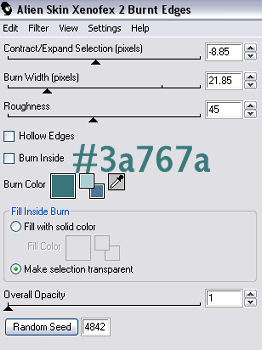
10. Effects - Plugins - Alien Skin - Xenofex 2 - Burnt Edges.
See settings below...
11. Open your original graphic ( the xmas stocking).
Edit - Copy.
12. Make your 'textured effect' image active.
Edit - Paste - As a new layer.
Keep this layer active.
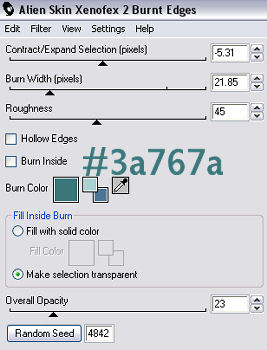
13. Effects - Plugins - Alien Skin - Xenofex 2 - Burnt Edges.
See settings below...
14. Layers - Merge - All Flattened.
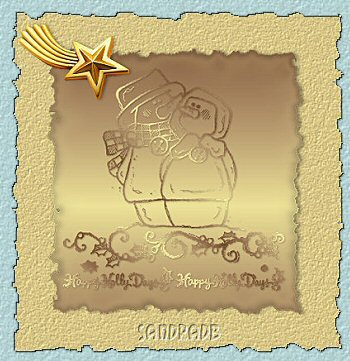
15. Add your name or watermark.
Save as gif.
Hope you enjoyed doing this tutorial.
'Happy Holidays'