
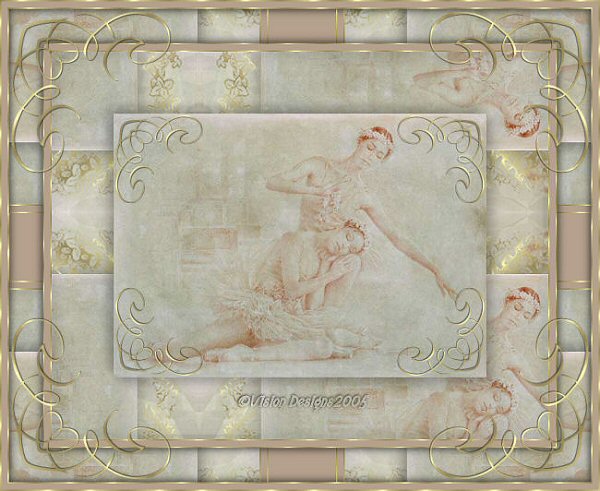

Supplies Needed...
Paint Shop Pro - Version X
Alf's Power Toys - Mirror Offset.
Xenofex 2 - Crumple.
Mask - jd mask 29
Corner Brushes - ss corners03 002.
Goldfill
You may download the mask, the corner brushes,
and the goldfill
'here'
Graphic of your choice.
*note*...The softer the tones in your graphic,
the softer the results will be.
I'm using one of Walter Girotto's beautiful paintings 'Elegant Tenderness'.
Mr Girotto gives permission for pspusers to use his paintings.
You may visit his site by clicking on the banner below.
Ok ...Let's get started...
1. Open your image. Duplicate twice.
Minimize one copy and close the original.
2. In layer palette, right-click on background layer, and Promote to Layer.
3. Image - Canvas Size - Increase dimensions by 200 px,
on width and height.
Don't worry about the size, as we'll resize later.
4. With magic wand, select the transparent border.
5. Activate the minimized image. Edit - Copy.
6. Activate the main image.
Edit - Paste into selection.
Keep selected.
7. New Raster layer. Flood fill with the gold fill.
8. Layers - Load mask from disk. Choose the jdmask 29.
You may wish to use a brighter mask, depending on your image.
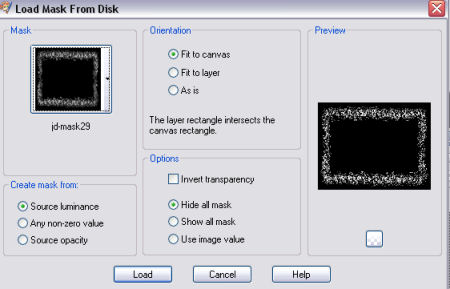
Load. Layers - Merge group.
9. Layers - Merge visible. Keep selected.
10. Effects - Plugins - Alf's Power Toys - Mirror offset.
See settings below...
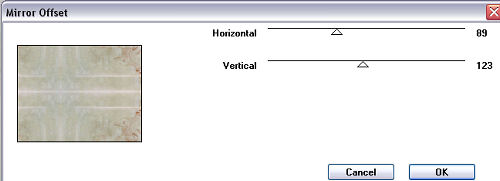
Keep selected.
11. Effects - Xenofex2 - Crumple.
*Note*...You may have to adjust your settings,
as 'crumple' may expose too much of a transparent edge.
This will depend on the size and shape of your graphic....
OR you can just crop before you add the border.
Settings - Subtle.
See settings below...
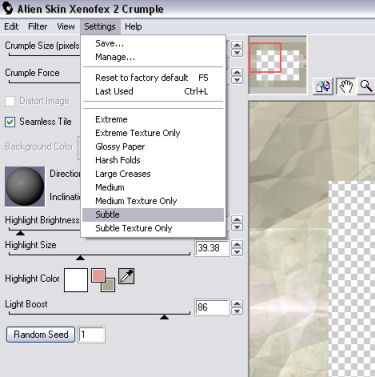
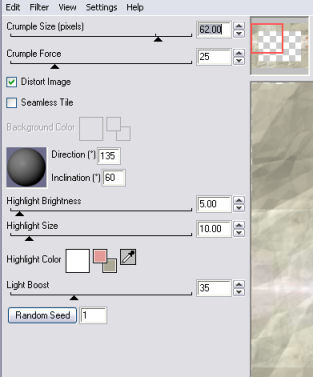
Keep selected.
12. Selections Invert.
13. Effects - 3D Effects - Drop Shadow.
See settings below...
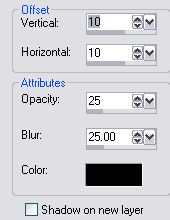
Repeat drop shadow, but change the V and H to minus 10.
14. Selections - Select none.
Layers - Merge all flattened.
Crop image , if necessary.
15. Image - Add borders - white - 2px.
Flood fill with goldfill.
16. Repeat Step 13.
17.Image - Add borders - white - 10 px.
Select and flood fill with a contrasting color from your image.
Deselect.
18. Image - Add borders - white - 2px.
Flood fill with goldfill.
19. Image - Add Borders - white - 55px.
Select with magic wand.
20. Floodfill with the contrasting color.
21. Repeat the 'Mirror Offset, but change the V and H settings to 128.
22. New Raster layer. Effects - 3D effects - Cutout.
See settings below...
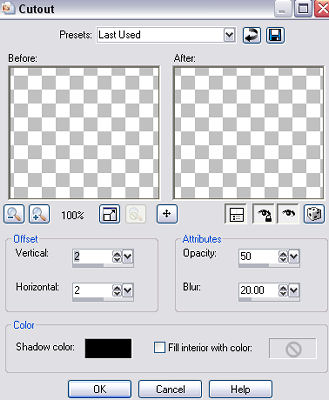
Repeat this step, but change the V and H to minus 2.
23. Repeat Steps 15, 17, and 18.
24. Add some decorative corners of your choice,
or you may use the ones I've supplied.
25. Add your name or watermark. Resize, and save as jpeg.
'Hope you've enjoyed this tutorial.'

Below is another one that I created, using brighter colors.
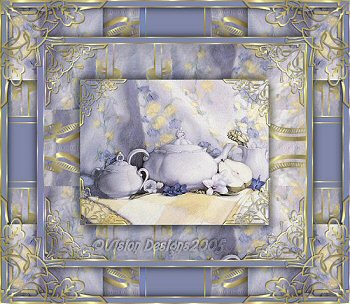




Dianne McFarlane
E-Mail: sdmcfarlane@nf.sympatico.ca
©Vision Designs
|