I have written this tutorial for my friend SandraDB.
I hope you like it, Sandra.

Supplies Needed...
Paint Shop Pro - Version X
A graphic and a large tube
that resemble each other.
For Example: A garden scene and a large flower tube.
The graphic should be smallish in size.
If it is large and really wide,
then you may skip Steps 2 to 7.
Plugins...
FM Tile Tools - Blend Emboss
Transparency - Eliminate black
Gregs Factory Output-VolII-Pool Shadow
Super Blade Pro...A preset of your choice.
I used 'jd silver glitter 1'
You may need to use something to match your graphic.
Ok, Let's get started.
1. Choose a soft color from your graphic.
2. Open a new image, at least twice the width of your graphic,
and a little larger in height than your tube.
Don't worry about the size, as we will resize later.*S*
3. With your new transparent image active,
select the left half of it.
4. Activate your graphic.
Edit - Copy.
5. Activate the transparent image.
Edit - Paste into selection.
*NOTE* It may be slightly distorted, but this is ok.
6. In Layer Palette, duplicate, Layer 1.
7. Highlight Copy of Layer 1.
Image - Mirror.
Layers - Merge visible.
8. We will be working with the large image from now on.
New Raster Layer.
Floodfill with your chosen soft color.
Reduce the opacity of this layer to 54.
Layers - Merge visible.
9. Effects - Plugins - FM Tile Tools - Blend Emboss.
Use default settings.
Apply this effect once more.
10. Activate your tube. If you have black showing on it,
Effects - Plugins - Transparency - Eliminate Black.
Edit - Copy.
11.Activate the graphic , we are now working on.
Edit - Paste as a new layer.
Reduce the opacity of this layer to 90.
12. Layers - Merge visible.
13. Selection Tool - Ellipse - Feather 20.
Draw an ellipse to include much of the center of this layer.
Selections - Invert.
14. Effects - Distortion Effects - Spiky Halo.
Use the soft color from your graphic.
See Settings below.
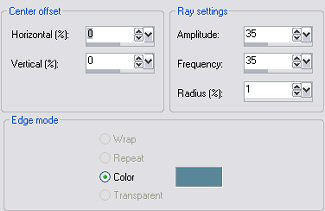
Selections - Select none.
15. Layers - Merge - All Flattened.
16. Image - Add borders - 2px - white.
17. Select border.
Effects - Plugins - Super Blade Pro.
Use a setting of your choice. (I used jd silver glitter 1)
18. Selections - Invert.
Effects - 3D effects - Cutout.
See settings below.
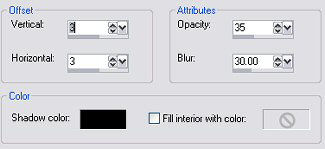 Repeat cutout, but change the V and H to Minus 3.
Selections - Select none.
19. Image - Add borders - 10 px - white.
Flood fill with a matching color from your graphic.
20. Effects - Gregs Factory Output Vol II - Pool Shadow.
Use default settings.
21. Repeat Steps 16 and 17.
22. Image - Add borders - 15px - white.
Select and floodfill with your chosen color.
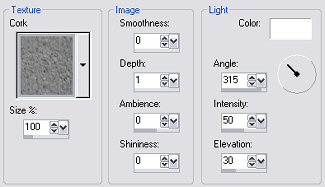
23. Effects - Texture Effects - Texture.
See settings below.
 Selections - Select none.
24. Repeat Steps 16 and 17.
25. Using the Selection Tool, rectangle, select a portion of your graphic.
See below...
 Edit - Copy.
26. Image - Add borders - 45px - white.
Select with magic wand.
Edit - Paste into Selection.
Keep Selected.
27. Repeat Step 20.
Selections - Select None.
28. Repeat Steps 16 and 17.
29. Repeat Steps 22 and 23.
30. Repeat Steps 16 and 17.
31. Add decorative corners of your choice.
32. Resize, add your name or watermark, and save as a jpg.
Thank you for trying my tutorial,
I hope you enjoyed it.
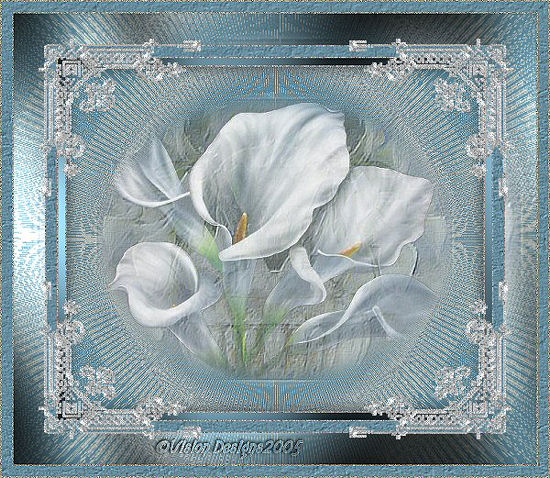
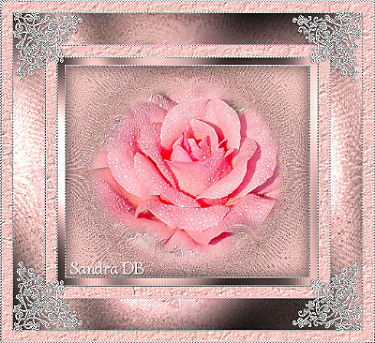
Below is the beautiful frame created by Sandra.
I'm soo pleased she liked the tutorial.
Thank you Sandra.
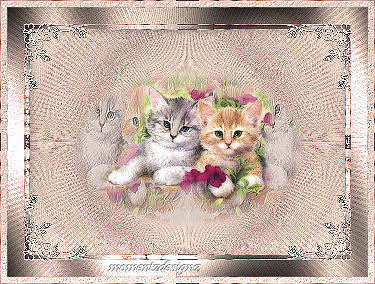
Below is another frame created by my sister Gayle, of Momentz Designz.
Thank you Gayle. It's really lovely.


Dianne McFarlane
E-Mail: sdmcfarlane@nf.sympatico.ca
©Vision Designs
|