Ok ...Let's get started...
1. Open your image. Duplicate three times.
Close the original.
Minimize the second copy.
2.First, we are going to make a template.
Open a transparent image, the same size as your graphic.
I'm using a mauve colored background,
so my screenshots will show up clearly.
3. New Raster Layer.
Selection Tool - Rectangle.
Draw a rectangle approximately 50px on each side.
See screenshot below...
Keep selected.
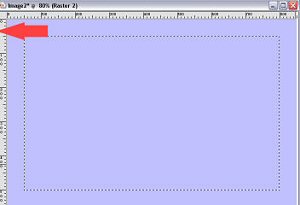
4. Still on Layer 2. Floodfill with white.
5. Selections - Modify - Contract by 8.
Hit your delete key. Deselect.
6. On the same raster layer, with the selection tool - rectangle,
draw another rectangle - 150 x 150, in the upper left corner.
See screenshot below...
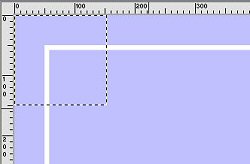
7. On this same raster layer (layer 2), floodfill with white.
*Note*... Be sure that your Tolerance is set to a lower number.
If not, when you Floodfill, you will end up filling the completely selected square.
My settings for the Floodfill are as follows...
Match Mode - RGB Value
Tolerance - 97
Use all layers - Unticked
Blend Mode - Normal
Opacity - Unticked
Thank you to my great sister, for discovering this little tidbit of info. *S*
Selections - Modify - Contact by 8.
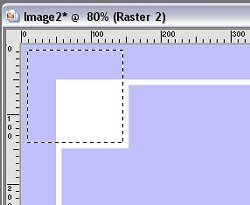
Hit your delete key.
This is what you should have...
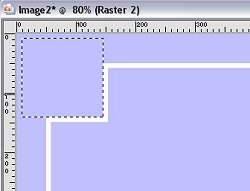
Deselect.
8. Still on raster layer 2, repeat this procedure for the remaining three corners.
Below is what you should have...
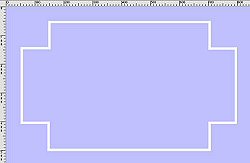
9. With layer 2 highlighted - Right-click - Duplicate.
Image - Resize - 85%.
Resize all layers unticked.
Below is what you should have...
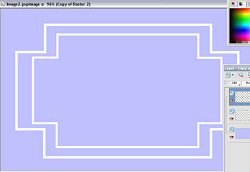
*note* You may save this as a template for use at another time.
Remember to keep the two layers seperate.
Do not merge them.
10. Activate the minimized image. Edit - Copy.
Back to the template image. Highlight layer 1.
Selections - Select all.
Edit - paste into selection. Deselect.
11. Highlight Layer 2.
With magic wand, click between the two white templates.
New raster layer (layer 3).
Edit - Paste into selection. Deselect.
12. Highlight Copy of Layer 2.
With magic wand, click in the center of the smaller template.
New raster layer (layer 4).
Edit - Paste into selection. Deselect.
Your layer palette should look like mine below...
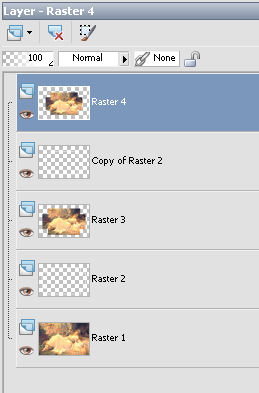
13. Highlight Raster layer 2.
With magic wand, click between the edge and the first template.
14. Highlight Raster layer 1.
Adjust - Blur- Gaussian blur - radius 5.
15. Effects - Plugins - Gregs Factory Output II - Pool Shadow.
Use default Settings. Deselect.
16. Move raster layer 2 abpove Raster layer 3.
Your layer palette should look like mine below...
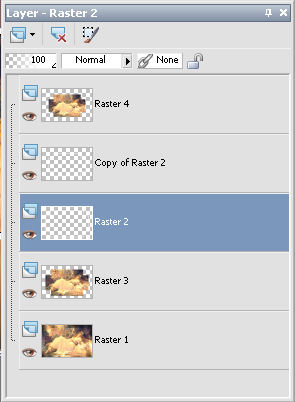
17. Still on Layer 2, With magic wand, click between the two templates.
18. Highlight Raster layer 3.
Effects - Texture Effects - Mosiac Glass.
See settings below...
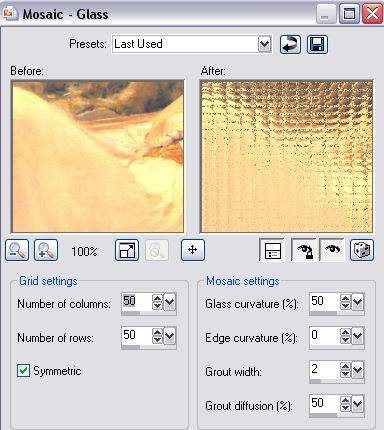
Deselect.
19. Highlight Layer 2 (the outside template).
20. Effects - U-Lead - Art texture.
See screenshots below for settings...
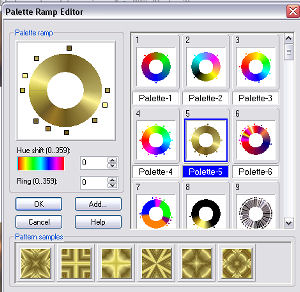
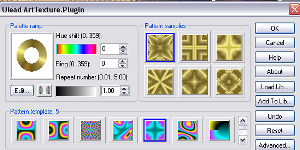
21. Effects - Eye Candy 3.1 - Jiggle.
See settings below...
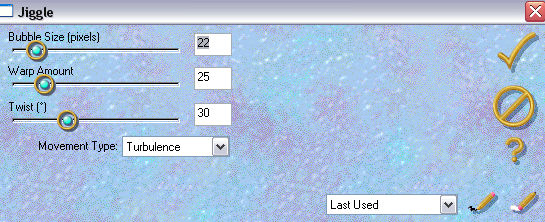
22. Effects - 3D effects - Drop Shadow.
See settings below...
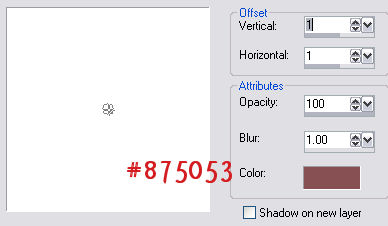
*note* You may have to play with the color setting, depending on your graphic.
23. Highlight Copy of Raster 2.
Repeat Steps 20, 21, and 22.
24. Layers - Merge - All Flattened.
25. Image - Add Borders - 15px - white.
Select with magic wand.
26. Repeat Steps 20 and 21.
27. Add decorative corners of your choice.
28. Add your watermark. Resize and save as a jpeg
I hope you enjoyed doing this tutorial.