
Supplies Needed...
Paint Shop Pro - Version 10
A graphic of your choice.
It doesn't have to be a Christmas graphic,
as we will be distorting it quite a bit,
so just go for your color tones.
For example...If you like reds,
then choose a graphic with lots of red in it.
Plugins...
Gregs Factory Output - Volumn II - Pool Shadow
Super Blade Pro - D_silver shimmer
Brushstrokes
Snowflakes2 - True Type Font
You may download the Snowflakes2
'HERE'
Ok ...Let's get started...
1. Open your graphic.
Edit - Copy.
2. Open a new transparent image...800x600.
You may resize it later.
Selections - Select all.
3. Edit - Paste into selection.
Selections - Select none.
4. Adjust - Blur - Gaussian Blur - Radius 9.
Note... Your Radius Setting will depend upon your graphic,
as we don't want to totally blur it out.
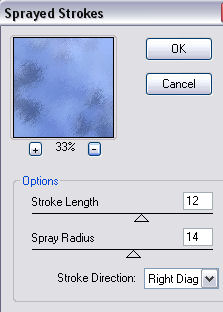
5. Effects - Plugins - Brushstrokes - Sprayed Strokes.
See settings below...
Note...If you find you aren't seeing much difference,
adjust the setting for the Radius in Step 4.
Apply this effect two or three more times.
6. Effects - Plugins - Gregs Factory Output, Volumn II - Pool Shadow.
Use default Settings.
7. New raster layer.
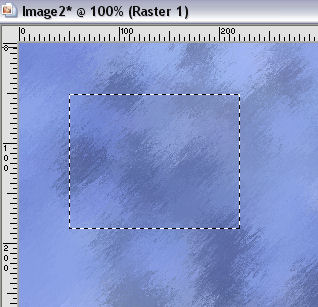
With Selection Tool, set to rectangle,
Draw a small rectangle in the upper Left corner.
See below...
Keep selected.
8. Choose a medium to dark color from your background.
Floodfill the small rectangle with the color.
Keep selected.
9. In your layer palette, R-click on this layer(the small rectangle).
Duplicate.
Effects - Plugins - Flaming Pear - Super Blade Pro - D_Silver shimmer.
See settings below...
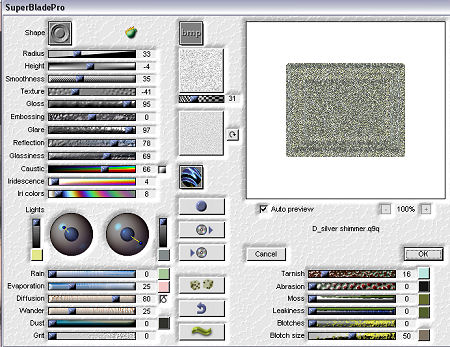
Selections - Modify - Contract by 4.
Hit your Delete key.
Effects - Plugins - Gregs Factory Output, Volumn II - Pool Shadow.
Use default Settings.
Selections - Select none.
10. Close off layer one.
Merge visible layer 2 and the copy.
Turn Layer 1 back on.
11. In Layer palette, R-click on the merged layer(the small rectangle)
Duplicate.
Move into position below the first rectangle.
12. Repeat Step 11, for a third rectangle.
Move it into position below the other two rectangles.
13. New raster layer.
Using the same method as in Steps 7 to 9,
only draw a larger rectangle, see final image.
14. Close off all layers except for the large rectangle
and it's framed edge layer.
Merge - visible.
Turn the other layers back on.
15. New raster layer.
Choose your favorite Holiday saying,
and using a decorative Script font,
write the first word in script.
I'm using Scriptina.
See settings below...

Apply the second word or words in a plainer, more simple font.
I'm using Castellar, at size 48.
16. Highlight each font layer, and apply
the Super Blade Pro, using the same settings as in Step 9.
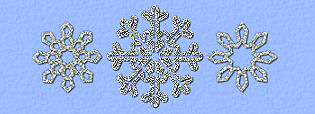
17. We're going to make some snowflakes.
Open the Snowflakes2 Font , and minimize it on your desktop.
It will now be included in your fonts list when you open them up in psp.
Open a new workspace for the snowflakes.
Make your foreground and background colors white.
Click on the Snowflakes2 font and choose whichever snowflakes you like.
Use settings below...

Create them as Vector layers, so you may enlarge them using the vector handles.
Create them using approximately six small squares on the transparent background.
Make six different snowflakes on this transparent sheet.
As you create each one, R-click on the Vector layer,
and Convert to raster layer.
Once you have created all of your snowflakes,
Merge Visible. We still want to keep the transparency.
Apply the Super Blade Pro effect.
Same settings as in Step 9.
Select each one separately, and paste as a new image.
Export each as a picture tube.
They will now be available for you to use again.
18. Now that we have the snowflakes made and exported as picture tubes,
we will begin using them in different sizes within our small rectangles.
In the layer palette, highlight the top small rectangle.
Selections - Select all>br>
Selections - Float
Selections - Defloat
Selections - Modify - Contract by 4.
New Raster Layer.
Using different snowflakes, and different sizes,
place your (picture tube) snowflakes in the rectangle.
See my final image.
Selections - Select none.
19. Repeat Step 18 for the other two small rectangles.
Note... Make certain that the snowflakes are on their own layer for each rectangle.
20. In the layer palette, close off ALL of the
layers EXCEPT for the three snowflake layers,
and in my case the word 'Holiday' layer.
Be certain that one of the snowflake layers is highlighted,
Merge - Visible.
Move this layer to the top in the layer palette.
21. With the other layers still turned off,
Edit - Copy
Edit - Paste as a new image.
Set aside for the moment.
Note - In order to add an edge to our card,
we need to save this part for our animation later...
22. Back to our main working area...
Check to be certain that the layers are all merged visible.
Image - Add Borders - 2px - white
Select and apply the Super Blade Pro, settings from Step 9.
Selections - Select none.
23. Image - Add borders 30px - white.
Select and floodfill with your background image.
Repeat Steps 4, 5, and 6.
24. Repeat Step 22.
25. Activate the copy you made in Step 21.
Edit - Copy.
Activate your main working area.
Edit - Paste as a new layer.
NOTE... It is important that you carefully line up the edges
of the snowflakes and the letters of the word Holiday.
26. Selections - Select all.
Selections - Float
Selections - Defloat
Keep Selected.
27. Layers - Merge - All flattened.
If you wish to resize, now is the time to do so.
Keep selected.
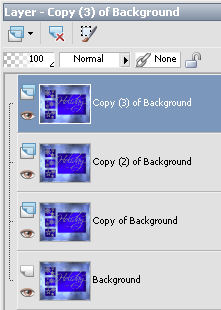
28. In the layer palette, duplicate three times.
You will have four layers. Keep selected.
See below...
29. Highlight the bottom layer.
Adjust - Add noise.
See settings below...
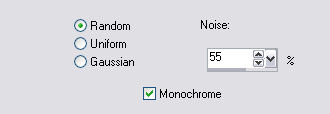
30. Highlight each layer in turn, adding noise,
but changing the % for each one as follows...
Layer one - 55%
Layer two - 60%
Layer three - 65%
Layer four - 70%
Selections - Select none.
IMPORTANT - DO NOT MERGE.
31. Save as PSP Animation Shop.
Remember what name you have given it.*S*
32. Open Animation Shop.
File - Open the PSP Animation.
View - Animation.
If you're satisfied, go to ...
File - Save as (name your gif)
Click next, next, next and finish.
Thank you for trying my tutorial.
'Season's Greetings'

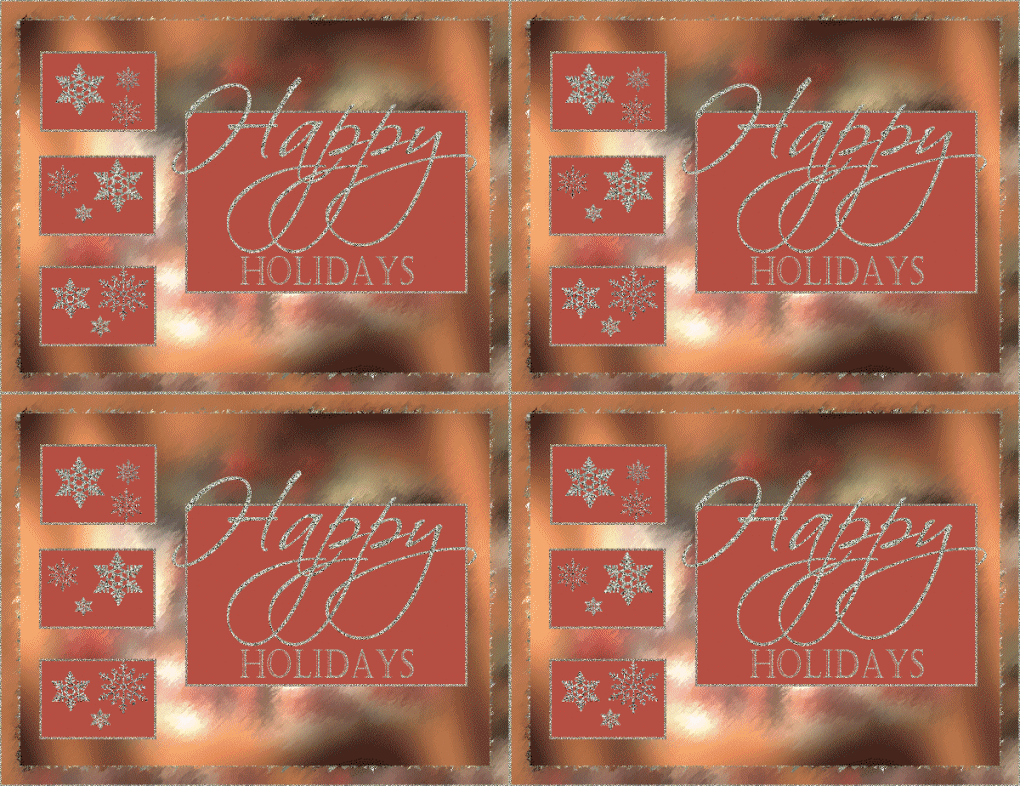
A huge thankyou to my friend Darlene, for testing this tutorial for me.
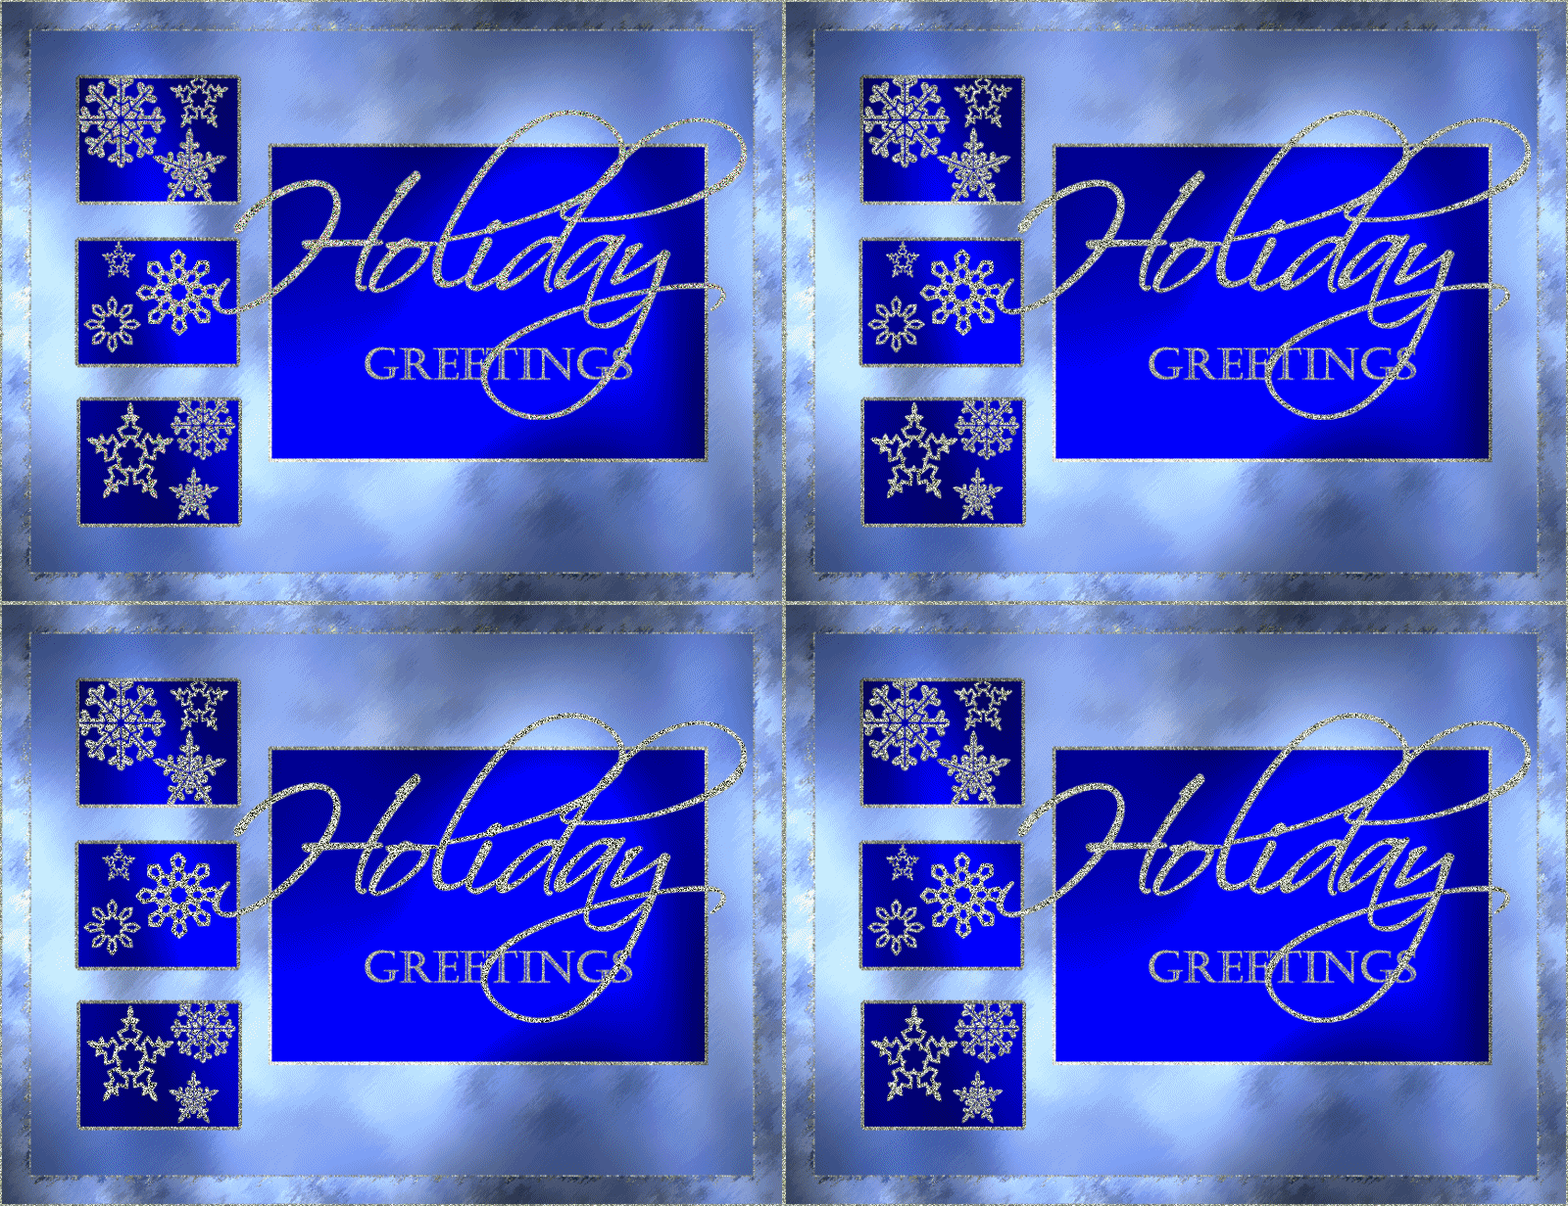
You may see her wonderful result below...


Dianne McFarlane
E-Mail: sdmcfarlane@nf.sympatico.ca
©Vision Designs

Free JavaScripts provided
by The JavaScript Source
|