

Misting images gives a beautiful transparent faded edge
to your image, photograph, or graphic.
You may also use this method to select a portion of the photograph,
and give it a lovely transparent edge.
Following is my simple method of how I use 'misting'.

Supplies Needed...
Paint Shop Pro - Version 10
You may use any version of psp.
Photograph of your choice.
Ok, Let's get started...
1.Open your photograph or graphic.
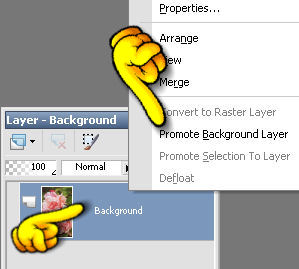
2. In your Layer Palette - Right-click
on the Background Layer, and
Promote Background Layer.
This will give you a transparent background,
when you do the misting.

Misting A

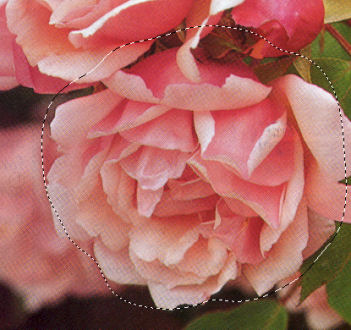
3. Click on the Selection Tool.
You may choose any shape you prefer,
I'm going to use the ellipse.
Feather set to 38.
You may play around with the Feather Setting
to get the effect that will appeal to your particular
photograph or graphic.
See settings below...

Save your image as a psp image.

Misting B

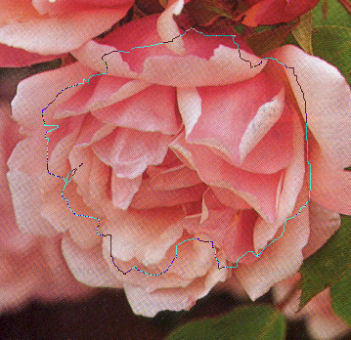
4. This method involves tracing around
a portion of your photograph or graphic.
You will be drawing around the part of the graphic or photograph.
You may try to trace your image,
or draw inside or outside of the image.
*NOTE* It won't matter how accurate you are,
as it will be feathered.
See Screenshots below...
5. Open the Selection Tool, and choose the 'Freehand Tool'.
See Settings below...
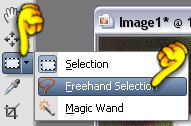

In my graphic, you will see a similar result.
This 'freehand' selecting for misting, can produce lovely results,
as it does allow you to select a smaller portion....
for example, just the eyes in a face or just a hand or even toes.*S*
Save your misted image as a psp.
In my samples, just below the 'Misting A and B' Headings,
after I did the misting, I added a patterned background.
Merged the layers,
and used a misted , rounded rectangle on the image.
I added a drop shadow...
V and H - 1, opacity - 85, blur - 36, color - a deep color from the roses.
This sort of gave it a halo effect.
I did this just to show what great effects you can achieve with 'Misting".
I hope you find this tutorial helpful,
and enjoy 'Misting' as much as I do.


Dianne McFarlane
E-Mail: sdmcfarlane@nf.sympatico.ca
©Vision Designs
|