
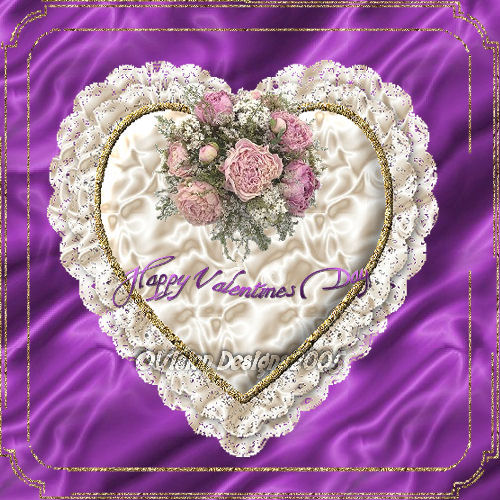

Supplies Needed...
Paint Shop Pro - Version 9
Floral Tube of your choice.
Mask - md-heart-kant mask Nanette2 mask,
or an Edge Mask of your choice.
Purple satin, ivory satin, goldglitter fill...
You may download the above supplies,
by clicking on the
'Zip File'
Ok Let's get started...
1. Open new transparent image - 500x500.
We can resize later.
2. Flood fill with the purple satin.
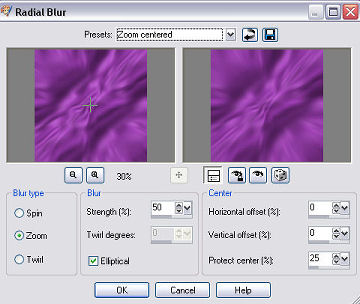
3. Adjust - Blur - Radial Blur.
See settings below...
4. Open your heart shape. Edit - Copy.
Make the purple image active. Edit - Paste as a new layer.
Just leave this layer for the moment.
5. New Raster Layer - Floodfill with the ivory satin.
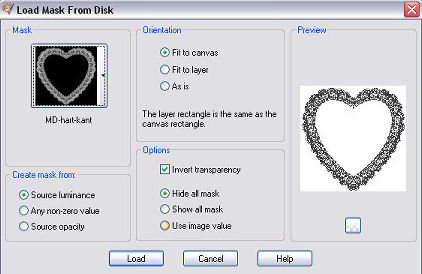
6. Layers - Load md-heart-mask from disc.
See settings below...
7. Layers - Merge group.
This is what you should have...
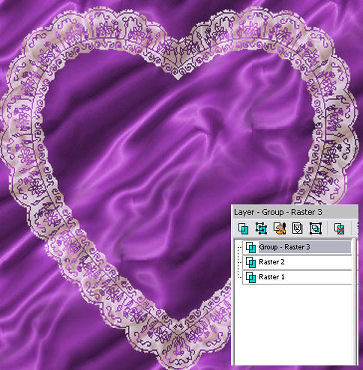
8. With Group-Raster3 highlighted, using your floodfill tool, and the ivory satin as the foreground pattern,
begin clicking all over the ruffle, until
you have it filled in as much as you like.
If you look at the screenshot for Step 10,
you can see how much I filled it in.
Note: If using pspX or higher, you may find it won't fill properly by just clicking...
try the following...
Keep the ivory satin in the foreground box, and click on the floodfill tool,
Set the Match mode to Opaque, Tolerance to 0, Blend Mode to Normal, and Opacity to 79.
Then just click once or twice on the lacey part of the heart.
9. Move layer 2 (the black heart shape) to the top.
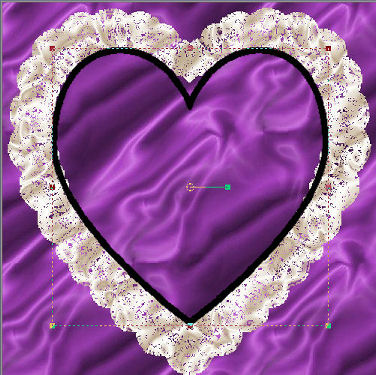
10. Using the deform tool, drag the shape
until it fits nicely over the edges of the ruffle.
Don't worry about the small bit at the top of the heart,
we'll fix that later...*S*...
See screen shot below.
11. Select the black heart.
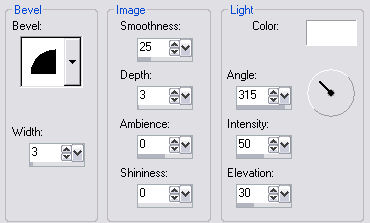
Floodfill with the gold glitter fill.
Effects - Inner bevel - See settings below...
Selections - Select None.
12. Highlight group layer 3.
Right-click and duplicate this layer.
13. Image - Resize 90%. Resize all layers unticked.
This will help fill in that little spot at the top.
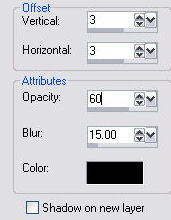
14. Effects - Drop Shadow - See settings below...
15. Highlight Raster 2 (the heart shape). Click inside center of heart.
16. Highlight - Copy of group-Raster3. Hit your delete key.
17. New Raster layer. Floodfill with the ivory satin.
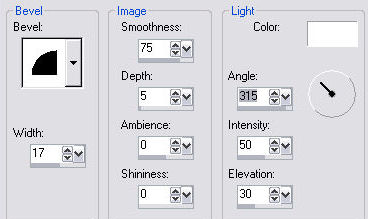
18. Effects - Inner bevel - See settings below.
19. Selections - Select none.
20. Close off the background layer.
Merge Visible.
Below is what you should have ...
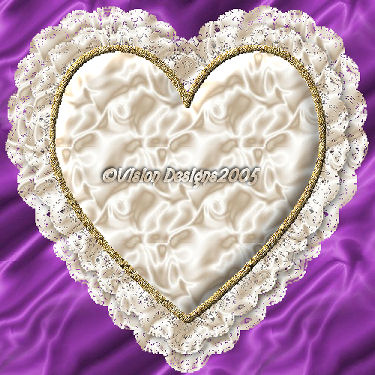
21. Image - Resize this layer - 90%.
22. Decorate with your favorite floral graphic.
23. Close off the background layer, once more.
Merge visible.
24. Image - Resize 90% - Resize all layers unticked.
25.Turn background layer back on.
26. Layers - Merge - All Flattened.
27. New Raster Layer.
Floodfill with the gold glitter fill.
28. Layers - Load Mask - Load mask from disk.
Choose the 'nanette2 mask', or one of your liking.
29. Layers - Merge Group.
30. Layers - Merge all flattened.
31. Add your favorite valentine text.
32. Resize , sharpen and save as jpg.
33. 'Happy Valentines Day'


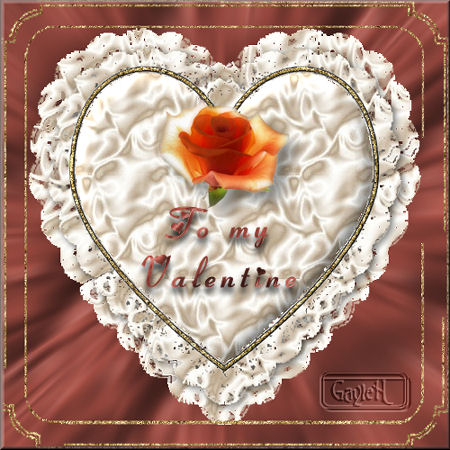
Thank you to my sister, Gayle
for testing this for me.
Below is her beautiful result...

Dianne McFarlane
E-Mail: sdmcfarlane@nf.sympatico.ca
©Vision Designs
|