Supplies Needed...
Paint Shop Pro - Version X
Ulead Art Texture
Gregs Factory Output - VolumnII - Pool Shadow
Mask - Zuzzanna Mask 36...
You may visit her site
'here'
and pick a mask of your choice.
Goldfill
Curly Art Nouveau Corners
Unzip, and minimize in your psp workspace.
It will show up when you scroll through your fonts
You may download the font
'here'
Graphic of your choice.
Choose one with nice bright colors.
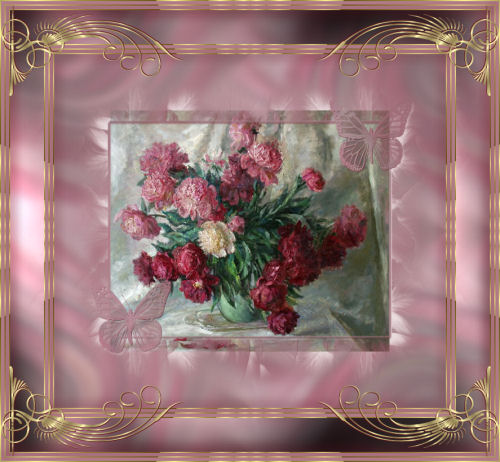
I am using a beautiful painting, 'Silk Poppies' by Canadian artist, Marianne Broome.
All work on her site is under copyright to Marianne,
and you must obtain written permission from the artist to use her work.
Thank you Marianne, for giving me permission
to use your wonderful floral painting.
You may visit her site by clicking on the banner below.
Ok ...Let's get started...
1. Open your image. Duplicate twice.
Minimize one and close the original.
2. Choose a medium and light tone from your graphic,
for the foreground and background colors.
3. Using one of the duplicated graphics...
Adjust - Blur - Gaussian Blur - Radius 9
Layers - New Raster Layer.
Floodfill with the Light tone.
Reduce the opacity of this layer to 65,
or to a value that suits your particular graphic.
Layers - Merge visible.
4. Effects - Distortion - Twirl.
264 degrees
5. Effects - Image Effects - Seamless Tiling
See settings below...

Set this graphic aside for now,
we'll be using it later.
6. Activate your minimized graphic.
Image - Canvas Size - Make it 200px larger in both height and width.
This may make it quite large, but we will resize later.
7. Select the white area with the magic wand.
New Raster layer. Flood fill with your darker chosen color.
Depending upon your chosen graphic,
you may have to reduce the opacity of this layer.
Selections - Select none.
8. Layers - New Raster layer.
In the materials palette, change to pattern,
and scroll for the seamless tile that you made in Step 5.
Floodfill this layer with the seamless tile.
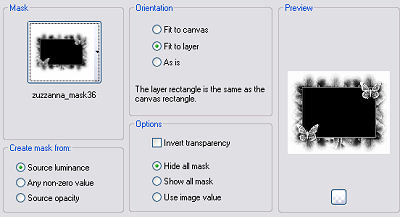
9. Layers - Load Mask. I chose the Zuzzanna_mask36.
See Settings below...
Layers - Merge group.
10. Effects - 3D Effects - Drop Shadow.
See Settings below...
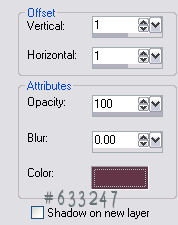
*Note* You may wish to change the color to suit your graphic.
11. Layers - Merge - All flattened.
Edit copy.
12. Image - Add borders - 2px - white.
Select with magic wand.
Effects - Plugins - Ulead - Art texture
See settings below...

Keep selected.
13. Effects - 3D Effects - Drop Shadow.
See settings below...
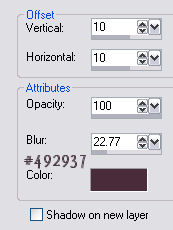
Repeat drop shadow, but change the V and H to minus 10.
Selections - Select none.
14. Image - Add borders - white - 6px.
Select with magic wand.
Flood fill with your either your medium or lighter color from Step 2.
Selections - Select none.
15. Repeat Steps 12 and 13.
16. Repeat Step 14.
17.Repeat Steps 12 and 13.
18. Image - Add borders - white - 60px.
Select with magic wand.
Edit - Paste into selection.
Your Copy from Step 11, should still be in psp's memory.
Keep selected.
19. Effects - Gregs Factory Output - VolumnII - Pool Shadow.
Use the Default Settings.
Selections - Select none.
20. Repeat Steps 12, 13, 14, 15, 16, and 17.
21. In your materials box, choose the gold foil for the background.
Choose a pretty corner from the Curly Art Nouveau Corners.
Note - Use lower case letters, until you find one that you like.
I used the letter i, at size 200.
22. Add your name or watermark. Resize, and save as jpeg.
'Hope you've enjoyed this tutorial.'
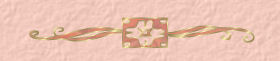
Below is another one that I created.


Dianne McFarlane
E-Mail: sdmcfarlane@nf.sympatico.ca
©Vision Designs
|