

Supplies Needed
Paint Shop Pro - Version 8
Graphic of your choice.
Gold Pattern.
Gold Corners.
No outside filters needed.
1. Open your graphic. Duplicate, and close the original.
2. Open a new transparent image...300px larger
than your graphic, on all four sides.
For example: If your graphic is 300 x 400,
then your transparent image will be 600 X 700.
3. Make graphic active. Edit - Copy.
*Note* If you image has alot of plain,
light or dark around the edges,
you may wish to select the brighter
or the more filled-in parts, toward the center.
4. Make transparent image active.
Selections - Select all.
Edit - paste into selection.
Your image may look out of proportion, but this is ok...*S*
5. Selections - Select none.
6. Adjust - Blur - Gaussian Blur - Radius 18.
7. Preset Shape Tool - Ellipse
See settings below.

Foreground Style - Pattern - Gold pattern.
Background - Null.
8. Draw an ellipse, to closely fill in the space.
See image below.
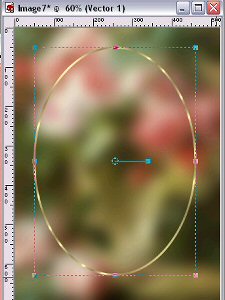
Use the nodes on the sides and top
to pull it out as evenly as possible.
9. When satisfied with your shape,
in the layer palette,
R-click on Vector 1, convert to raster layer.
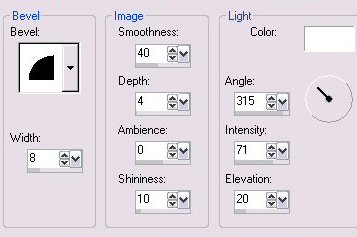
10. With raster layer 2 active,
Effects - 3D Effects - Inner bevel.
See settings below.
11. Repeat Steps 7 and 8.
This time , drawing your ellipse inside the first one.
Again, using the nodes on the Vector square to pull
it out as evenly as possible.
When satisfied, R-click , in layer palette,
and convert to raster layer.
12. Effects - 3D Effects - Inner bevel - Same settings as before.
13. Highlight layer 2.
With magic wand, click in between the two ellipses to select.
See settings below.

14. Layers - New raster layer.
Make certain the new layer is highlighted,
and floodfill with your image.
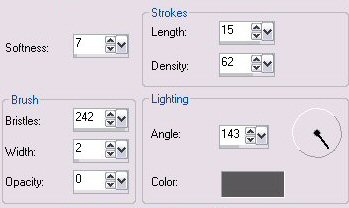
15. Effects - Art Media Effects - Brushstrokes.
See settings below.
16. Selections - Select none.
17. In Layer palette, highlight layer 3.
With magic wand, same settings as before,
click in the center of the smaller ellipse.
18. Highlight layer 4, and hit your delete key.
19. Highlight layer 1, and again hit your delete key.
Keep selected.
20. Flood fill with the gold pattern. Keep selected.
21. Selections - Modify - Contract by 6.
Hit your delete key. Keep selected.
22. Highlight your graphic. Edit - Copy.
23. Highlight your Vector frame.
Edit - Paste into selection.
Selections - Select none.
24. Layers - Merge all flattened.
25. Image - Add borders - white - 8px.
Select and floodfill with the gold pattern.
Keep selected.
26. Effects - 3D effects - Drop Shadow.
See settings below.
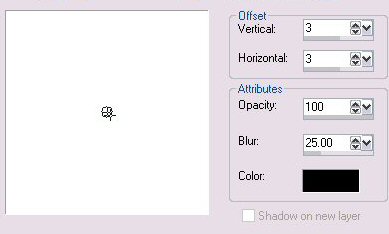
27. Repeat drop shadow, but change the V and H to minus.
Selections - Select none.
28. Image - Add borders - white - 5px.
Select and floodfill with the gold pattern.
Keep selected.
Effects - 3D Effects - Inner bevel - Same settings as before.
29. Open up your corner . Edit - Copy.
Highlight the frame. Edit - Paste - As a new layer.
Move into position in upper left corner.
30. In layer palette, R-click on layer 1.
Image - Mirror.
31. Turn off background layer,
make certain that one of the other layers is active.
Layers - Merge visible.
32. R-click on Merged layer - Duplicate - Image - Flip.
33. Layers - Merge all flattened.
34. Add your name or watermark.
Resize and save as jpeg.
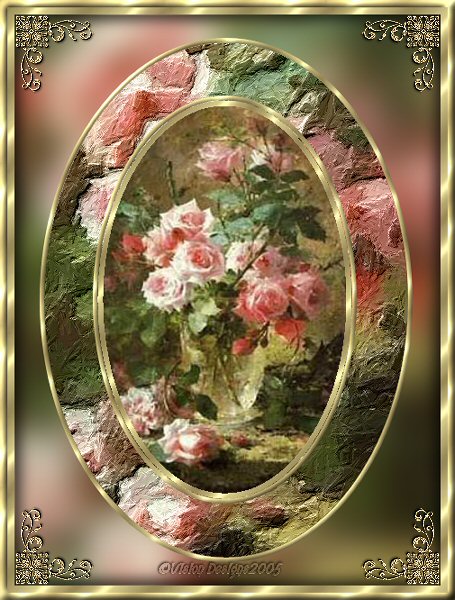
I hope you enjoyed making this tutorial....
Thank you to my sister, Gayle for testing this tutorial.
It shows a great effect that can be achieved
by using a little creativity and imagination,
Below is her lovely result.


Dianne McFarlane
E-Mail: sdmcfarlane@nf.sympatico.ca
©Vision Designs
|