

Supplies Needed...
Paint Shop Pro - Version 9
Graphic of your choice.
Gold corners of your choice.
No outside filters needed...*S*...
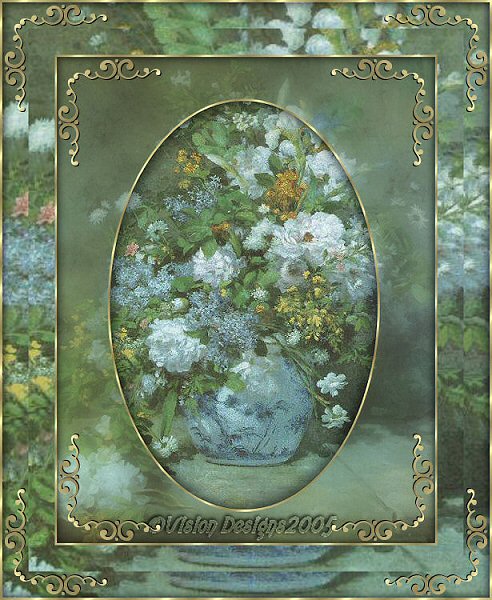
1. Open your graphic, and duplicate twice. Close original.
Minimize second copy for use later.
2. Layer palette - Promote background to layer, if necessary.
3. Selection Tool - Ellipse.
Draw an ellipse anywhere to include the
focal point of your graphic.
4. Selections - Invert.
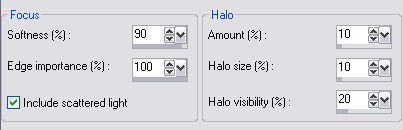
5. Adjust - Softness - Soft Focus - Soft detail.
Use the following settings:
6. Repeat Soft Focus.
This time use the default settings.( all set to 50)
This step will depend upon the graphic that
you've chosen...
You may decide if you need it.
7. Selections Invert.
8. New raster layer.
9. Flood fill with a gold pattern.
10. Selections - Modify - Contract 3. Hit your delete key.
11. New raster layer.
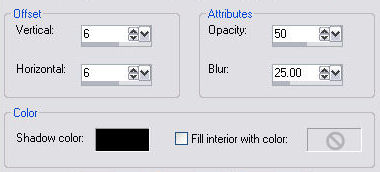
12. Effects - 3-D Effects - Cutout.
Use the following settings:
13. New raster layer.
Repeat cutout, except change the V and H to minus 6.
14. Layers - Merge - All Flattened.
Adjust - Sharpness - sharpen.
15. Selections - Select None.
16. Image - Add borders - White - 3px.
Select and flood fill with a gold pattern.
Selections - Invert.
17. New raster layer.
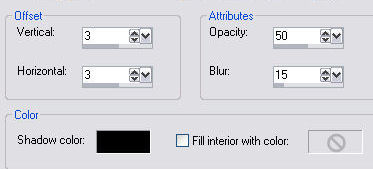
Effects - 3-D Effects - Cutout.
Use the following settings.
18. New raster layer.
Repeat Cutout, but change the V and H to minus 3.
Selections - Select None.
Layers - Merge All Flattened.
19. Image - Add Borders - White - 30px( or whatever size you prefer).
Select white border.
20. Make duplicate copy active. Edit - Copy.
21. Make graphic active. Edit - Paste into Selection.
You may decide, here, as to whether you
wish to keep the filled border sharp,
or apply the 'soft focus'. I decided to apply it to this one.
I love the effect it gives.
Selections - Select None.
22. Repeat Steps 19, 20, 21.
23. Repeat Step 16, 17, and 18.
24. Open up a decorative corner of your choice.
Edit - Copy.
25. Make your graphic active.
Edit - Paste as a new layer. Move into place in upper left corner.
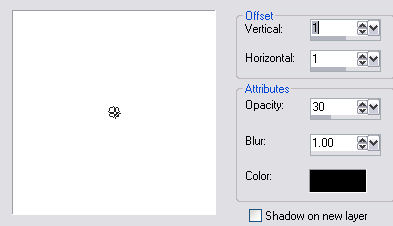
26. Effects - 3D Effects - Drop Shadow,
with the following settings:
27. In layer palette, R-click on layer 1- duplicate.
Image - Mirror
28. In layer palette, close off Background layer.
Be sure that one of the other layers is active, and merge visible.
29. R-click on merged layer - Duplicate.
Image - Flip.
Merge - All Flattened.
30. Add your name or watermark, Resize, and Save as jpg.
Hope you enjoyed this tutorial.
p align="center">
Here is another sample of this tutorial,
showing a single soft focus border.
I did this one in our 'Tutorial Writers' class.
'Cardinals'


Dianne McFarlane
E-Mail: sdmcfarlane@nf.sympatico.ca
©Vision Designs
|