
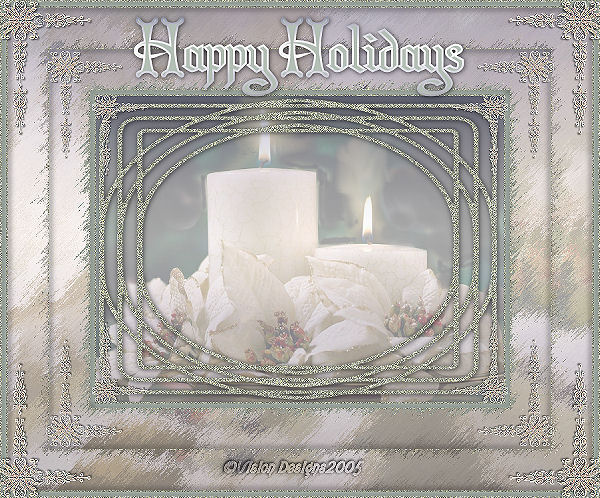

Supplies Needed...
Paint Shop Pro - Version 9 or later.
Christmas Graphic of your choice.
Try to choose a graphic with lots of white in it.
Super Blade Pro - I used D_silvershimmer.
Mask - dmsk0480
Gradient - teom_085
You may download the mask
and the gradient
'HERE'
You may download the 'Brushstrokes Filter'
'HERE'

Ok ...Let's get started...
1. Open your graphic. Duplicate twice.
Close the original. Minimize one copy .
2. New Raster Layer.
Floodfill with the teom_085 gradient.
Linear Style - Angle 0 - Repeats 0 - Invert-Unchecked.
Reduce the opacity of this layer to 66.
3. New Raster Layer.
Floodfill this layer with white.
4. Layers - Load/Save Mask - Load mask from disk.
Choose the mask - dmsk0480.
Layers - Merge Group.
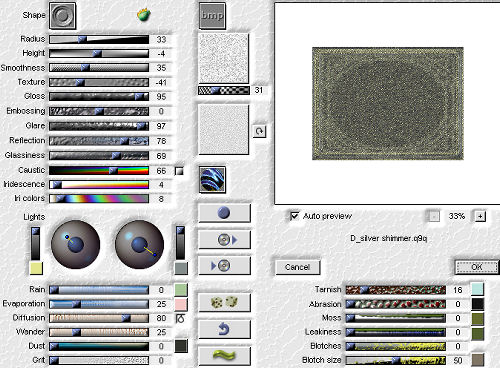
5. Effects - Plugins - Super Blade Pro.
Choose the D_Silver Shimmer.
See settings below...
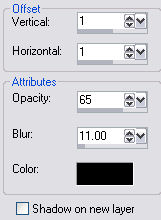
6. Effects - 3D Effects - Drop Shadow.
See Settings below...
7. Layers - Merge all flattened.
8. Image - Add Borders - 2px - white.
Select with magic wand.
9. Repeat Step 5.(Super Blade Pro)
Selections - Select none.
10. Image - Add Borders - 7px - white.
Select and floodfill with a very soft color from your graphic.
Selections - Select none.
11. Repeat Steps 8 and 9.
Keep selected.
12. Effects - 3D effects - Drop Shadow.
See settings below...
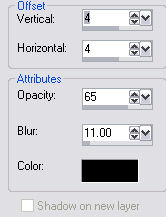
Repeat 'Drop Shadow', but change the V and H to minus 4.
Selections - Select none.
13. Image - Add borders - 60px - white.
Select with magic wand.
14. Activate minimized copy.
Using your selection tool, select a portion of your graphic.
Edit - Copy.
15. Activate your main graphic.
Edit - Paste into selection.
Keep selected.
16. New Raster layer.
Floodfill with the teom gradient.
Reduce the opacity of this layer to 66.
Keep selected.
17. Layers - Merge visible.
Keep selected.
18. Effects - Plugins - Brushstrokes.
Click on 'Sprayed Strokes', then follow settings below...
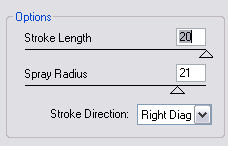
Repeat this effect once more.
Selections - Select none.
19. Repeat Steps 8 and 9.
20. Repeat Step 12.
Selections - Select none.
21. Repeat Steps 13 to 18.
22. Layers - Merge - All flattened.
23. Repeat Steps 8 and 9.
24. Repeat Step 12 - The drop shadow.
25. Repeat Steps 10 and 11.
26. Repeat Step 12.
27. Add your favorite Holiday saying,
using the colors and gradient from your framimg.
28. Add some decorative corners.
29. Add your name or watermark.
Resize and save as a jpeg.
'Happy Holidays'

Following are some lovely examples of this tutorial, created by my friends.
Created by my sister Gayle of Momentz Designz.
Thank you Gayle.


Created by my friend Sandra DB.
Thank you Sandra.


Created by my friend Foxy.
Thank you Foxy.



Dianne McFarlane
E-Mail: sdmcfarlane@nf.sympatico.ca
©Vision Designs
|