
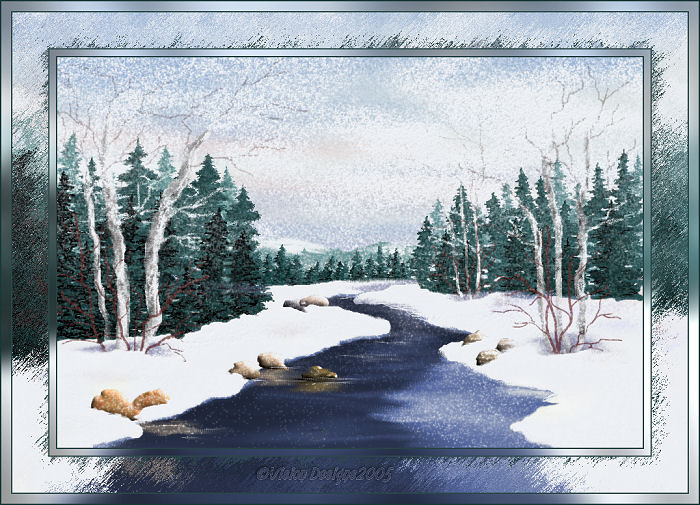

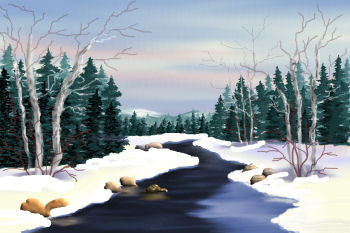
Let's add a few rocks to our painting.
55. Foreground - #808080.
Background - #404040.
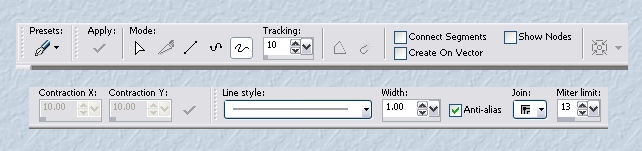
Using the Pen Tool - Free Hand.
See Settings below...
Give each rock its own layer.
Draw irregular shapes, here and there on your painting.
Put some in the water, so we can add some reflections.
Select each rock, and color it, or fill it with a pattern of your choice.
Remember that rocks are all sorts of colors. *S*
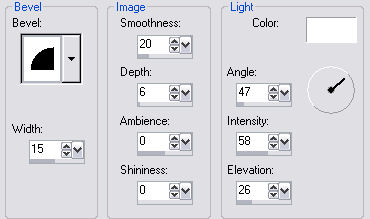
56. We'll also add an inner bevel to each one.
Selections - Select All.
Selections - Float.
Selections - Defloat.
Effects - 3D effects - Inner Bevel.
See settings below...
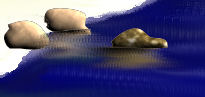
57. Ok...Let's reflect the rocks you put in the water.
Highlight one of the layers with a rock in the water...
Right-click on the layer. Duplicate.
Image - Flip.
Pull your copy up and under the original rock.
Smudge the reflected part in the water.
See image below...
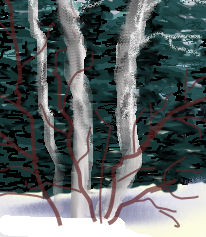
58. Now let's add some small twig type bushes near our Birches...
You may also add some in the snow as well.
Don't forget to put a dark shadow behind them if you do.
Foreground Color - #5e2424.
Using your Pen Tool - size 2 to 4.
Set to Freehand.
Draw some bushes and twigs.
See illustrations below...
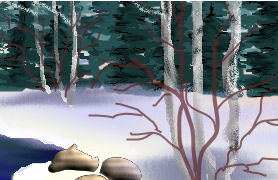
We should be approximately to this point, and are ready for a few final touches.
Save as 'winterscenepaintingf.psp'.
We're ready for Part G.


Dianne McFarlane
E-Mail: sdmcfarlane@nf.sympatico.ca
©Vision Designs
|